Prerequisites
- A portal with user accounts set up and integrated with Airtable.
Every user who creates an account in your portal will have their own profile page that is associated with their user record on Airtable. User groups is a great way to limit which fields they have access to and can edit.
Building the Profile Page
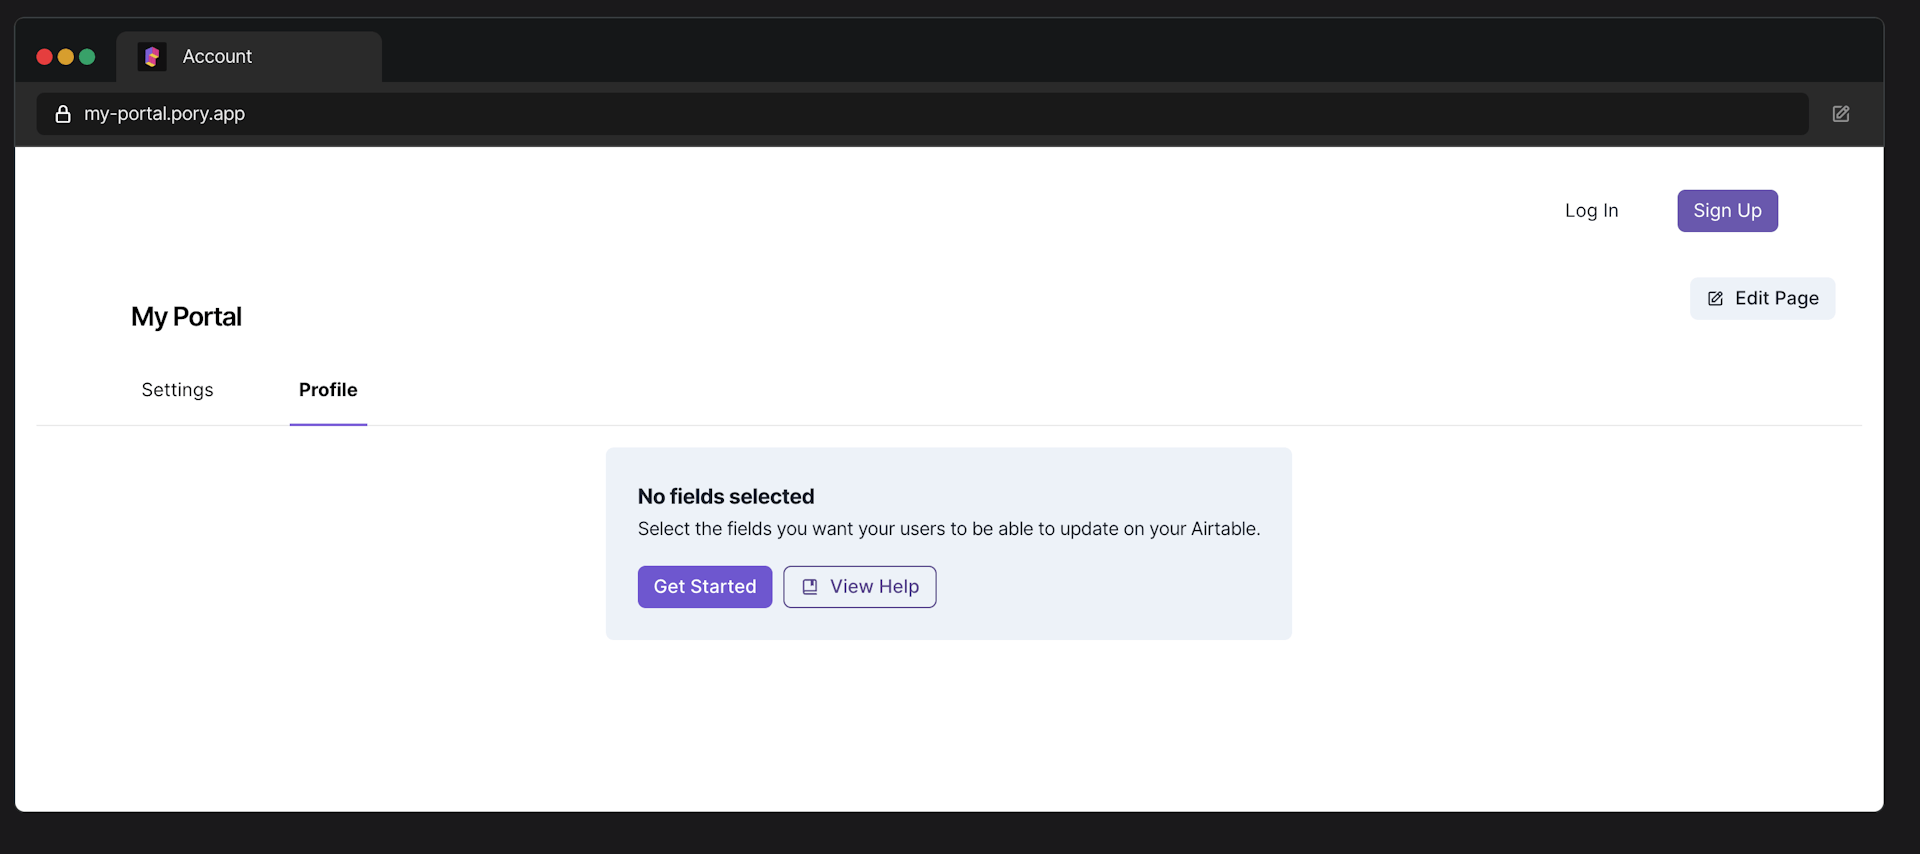
- Hover over the page and click on the Edit Page button to open up the field editor drawer. Alternatively, if this is your first time setting up, you can click the Get Started button.
From the field drawer
2. Select the field you wish to include in the page.

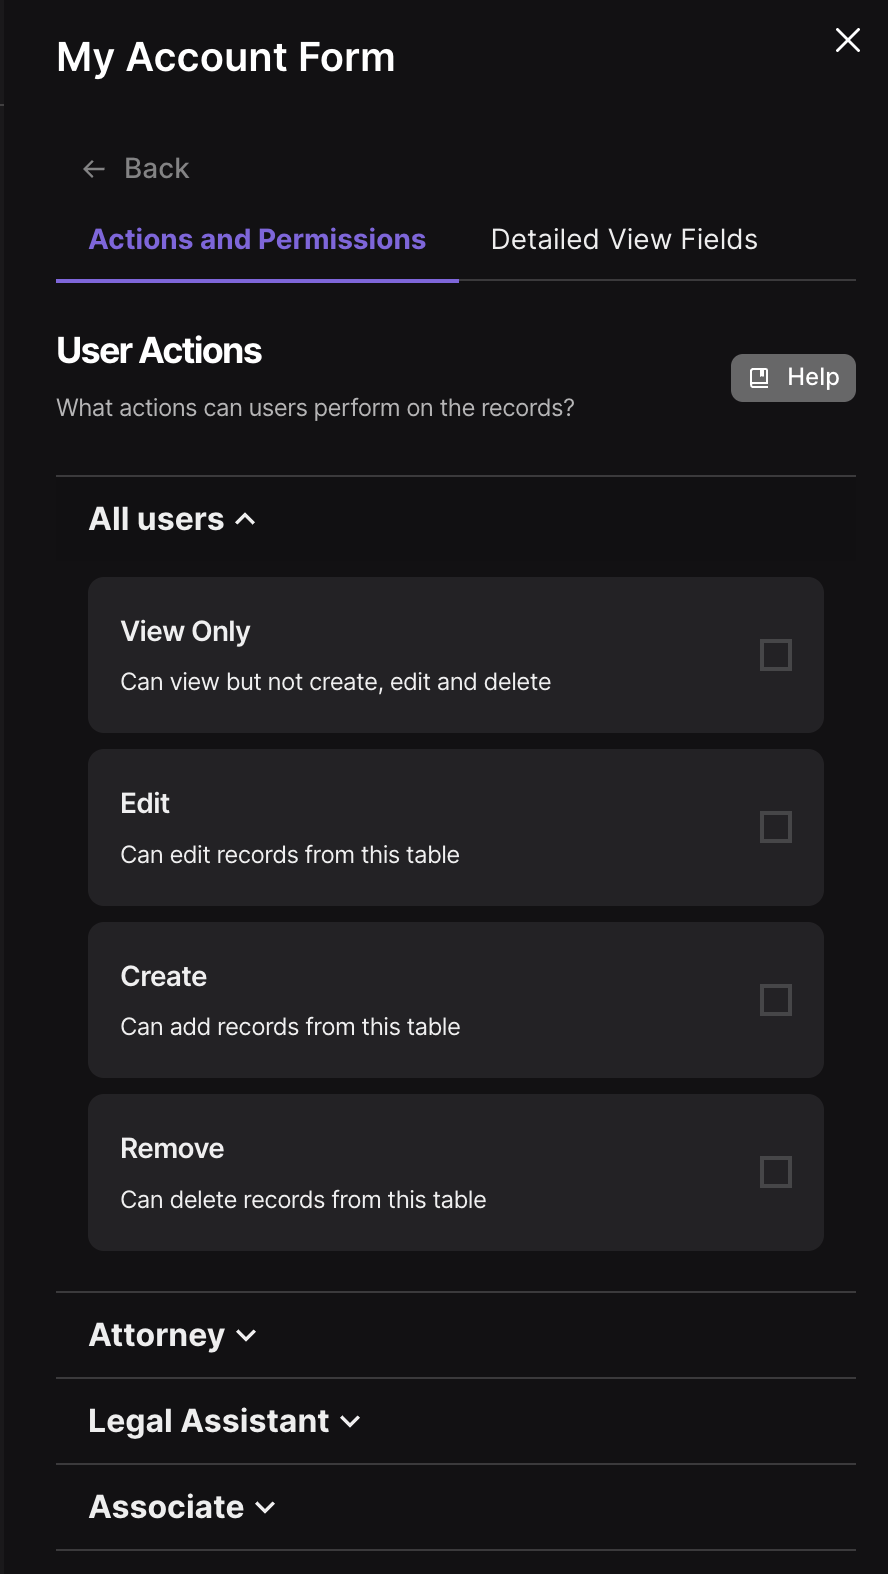
After selecting a field, you will be presented with options to determine who can see this field from their profile page. This is useful when you only want specific groups of users to see the selected field from your table.
- Select the groups of users who can edit this field.
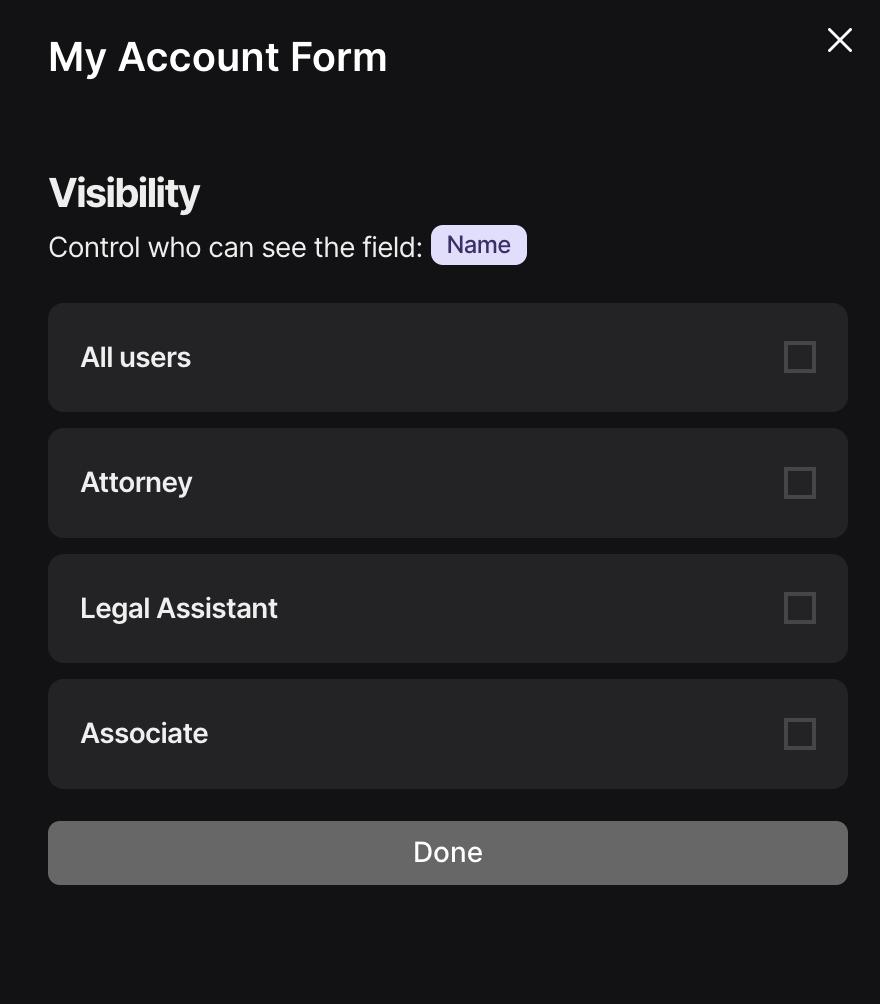
- Click on the Done button.
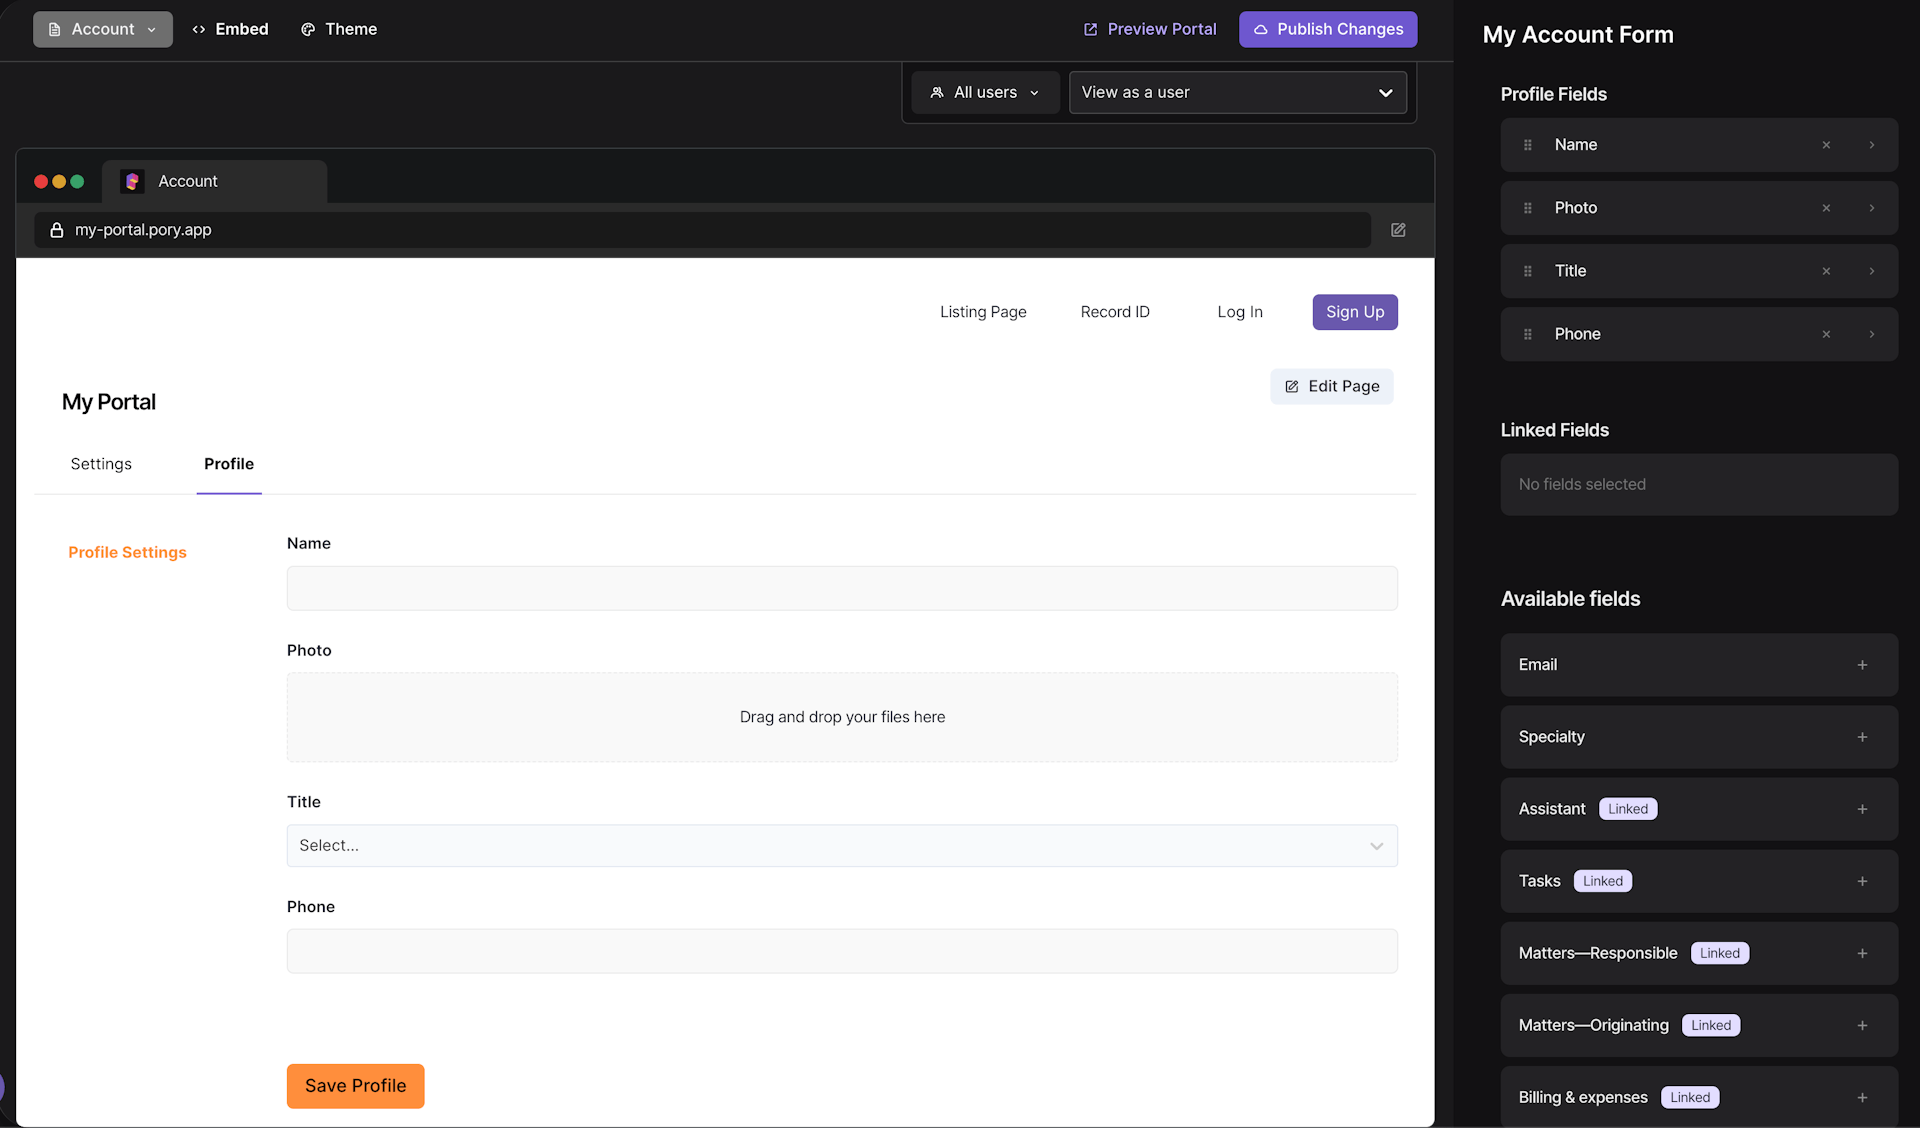
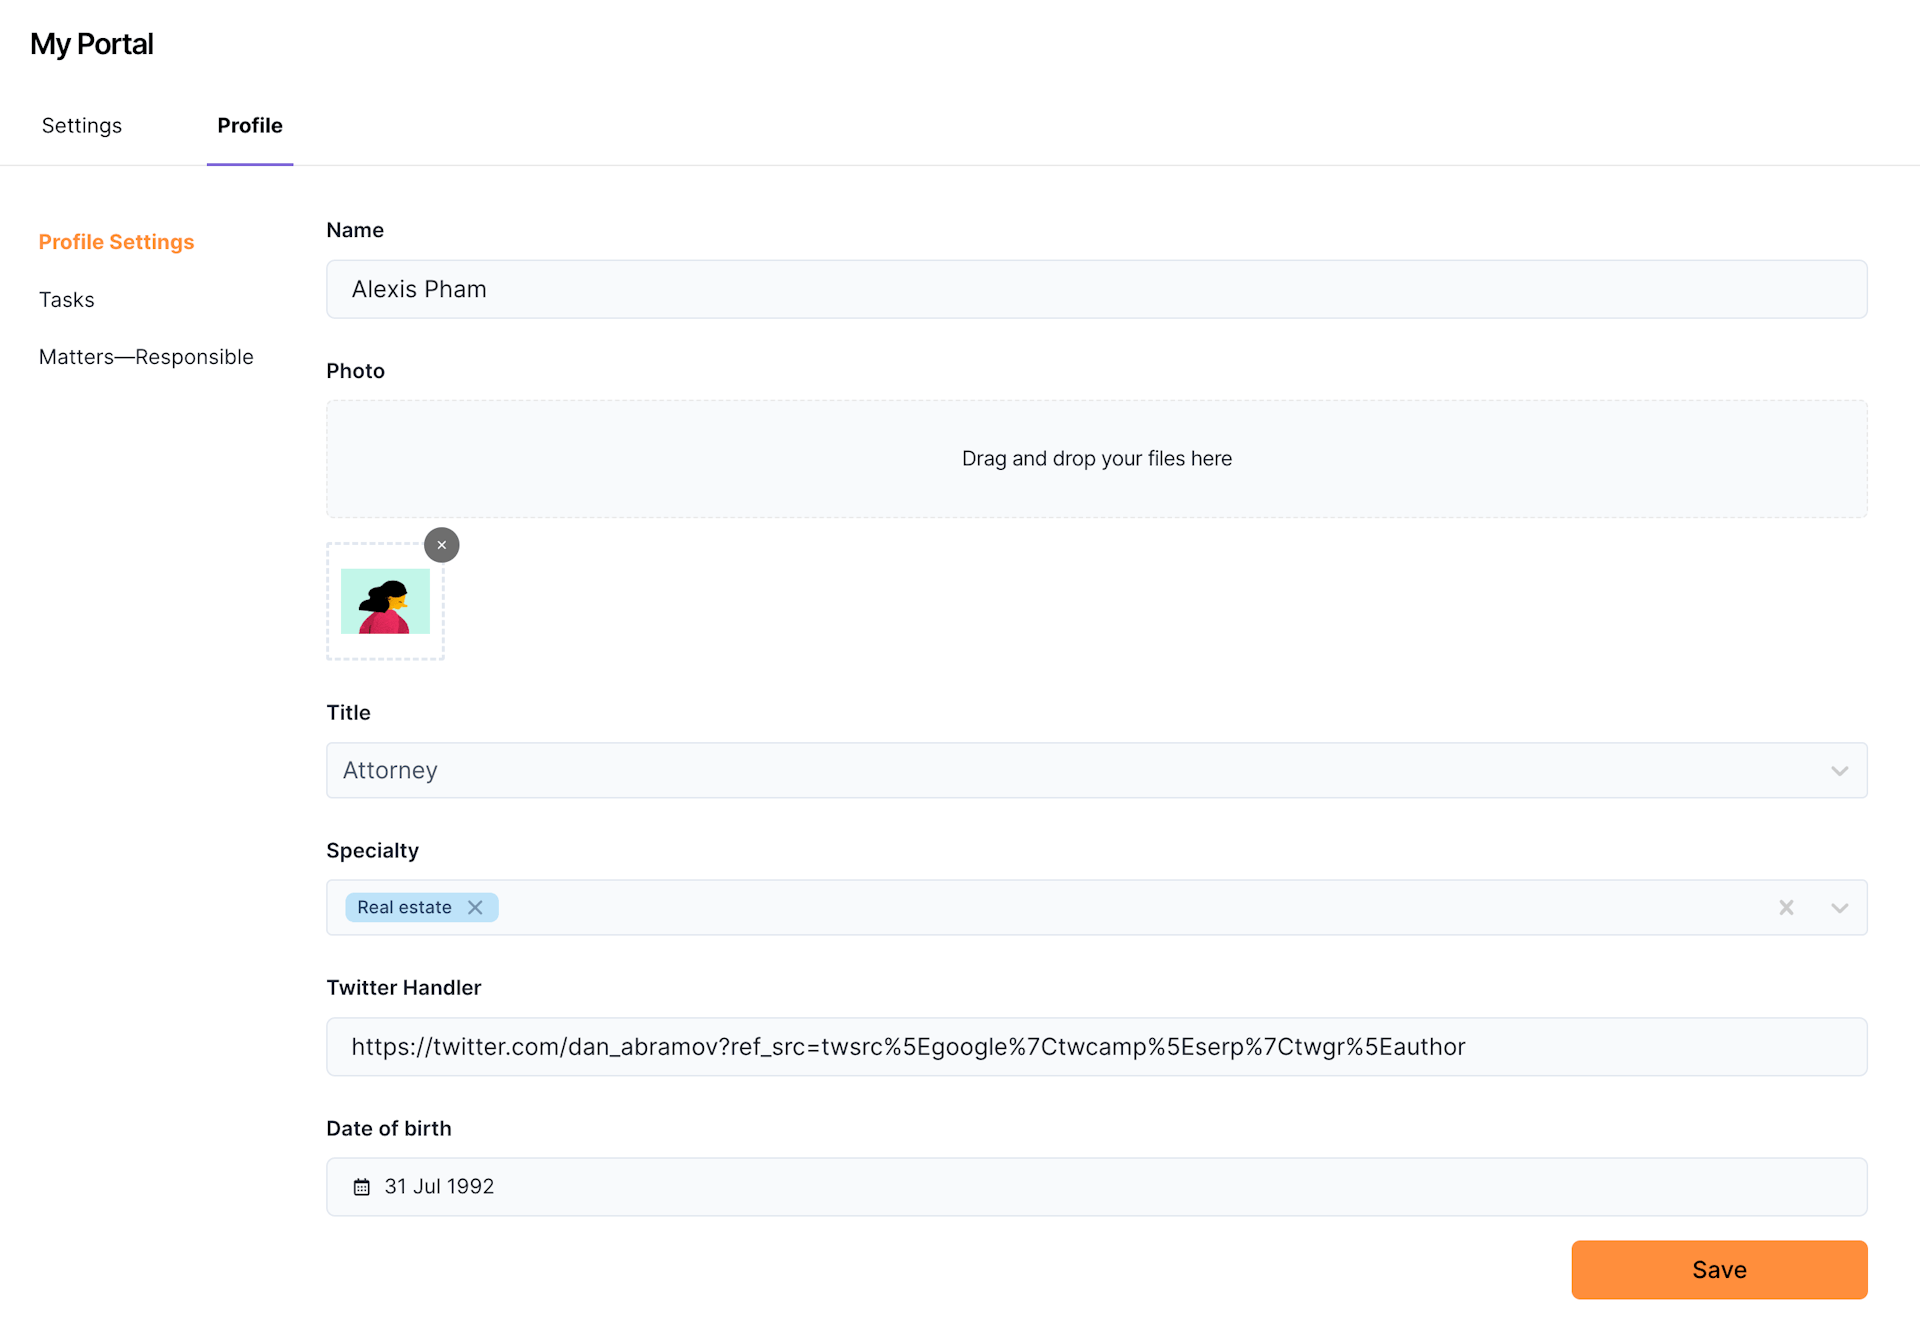
- Build out the rest of the profile page and click Publish Changes from on the top bar.
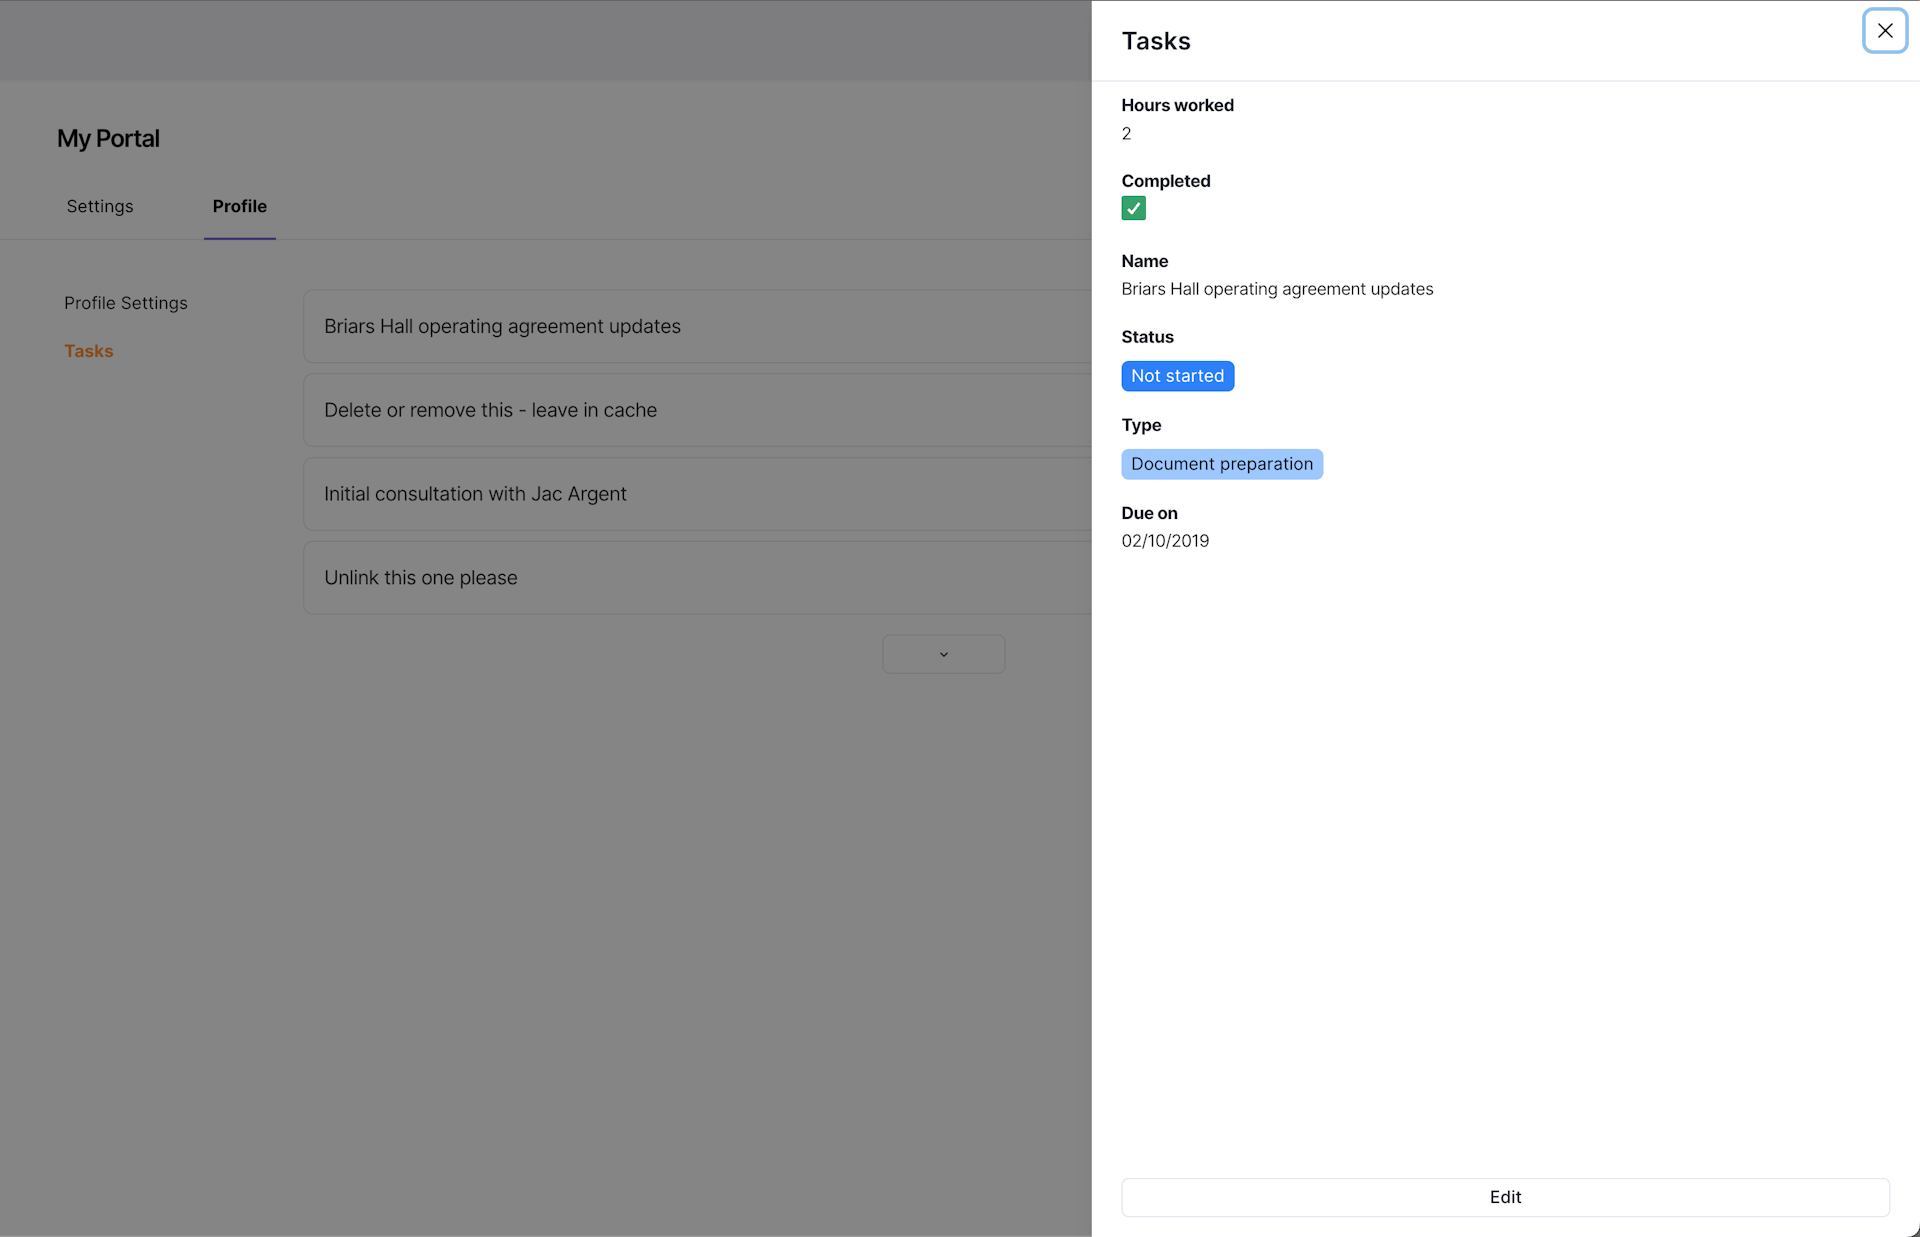
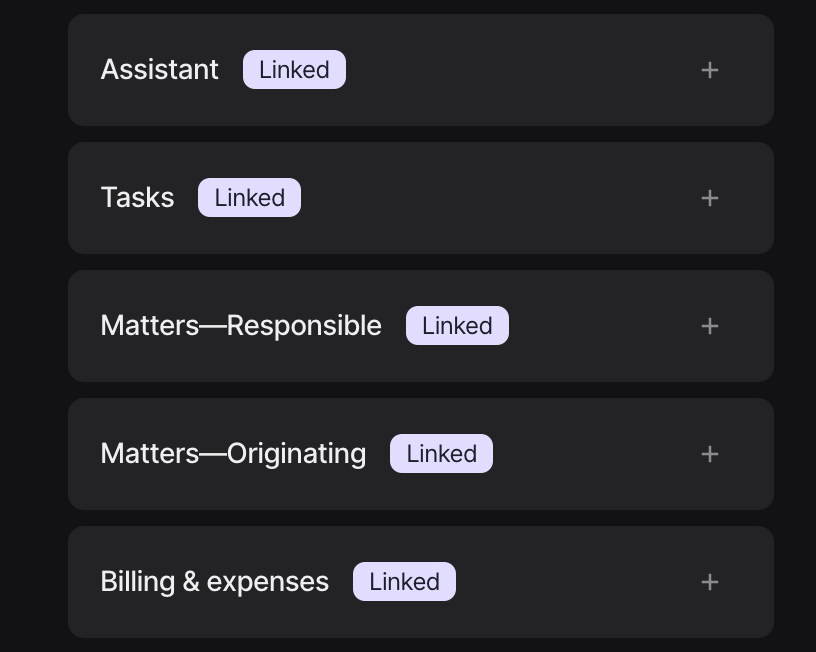
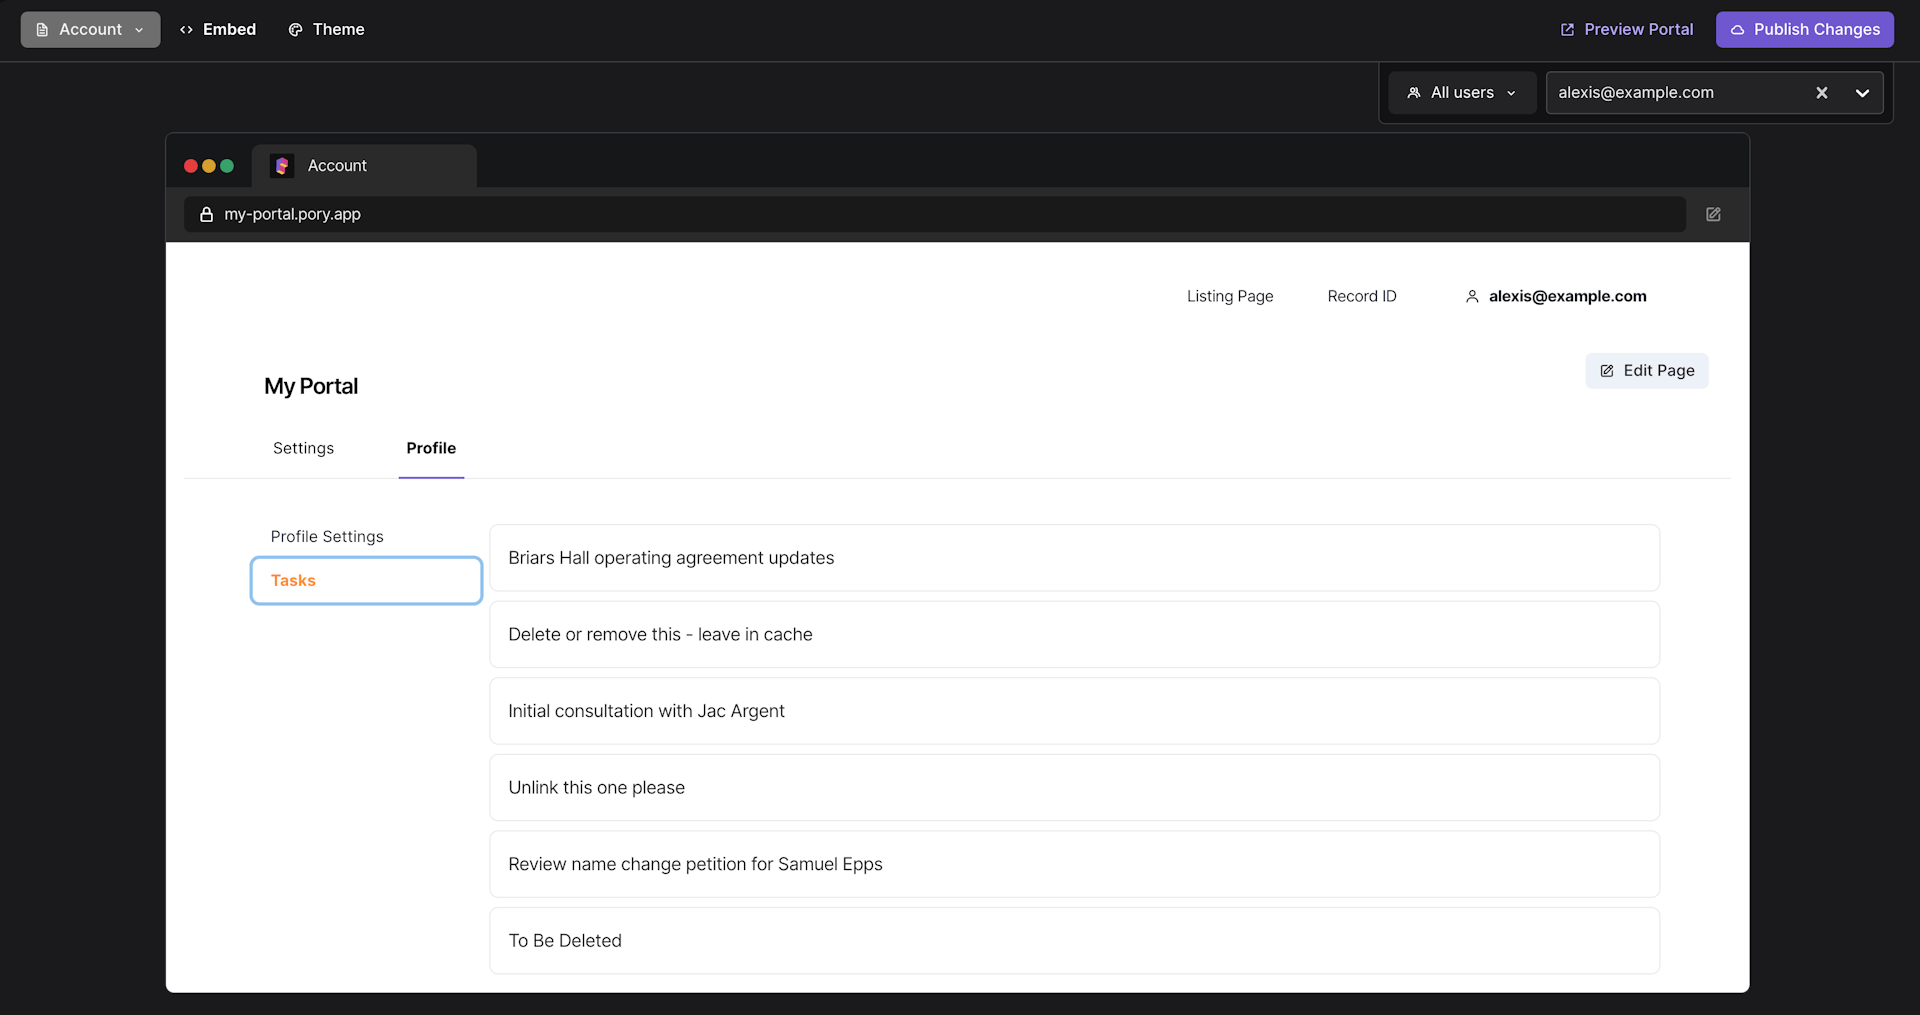
Linked Record Fields
Pory supports displaying and modifying linked record fields from the User table. However, we highly recommend creating a user listing instead.
- Select the linked records to include into the profile page.
- For each group, you can set whether they can:
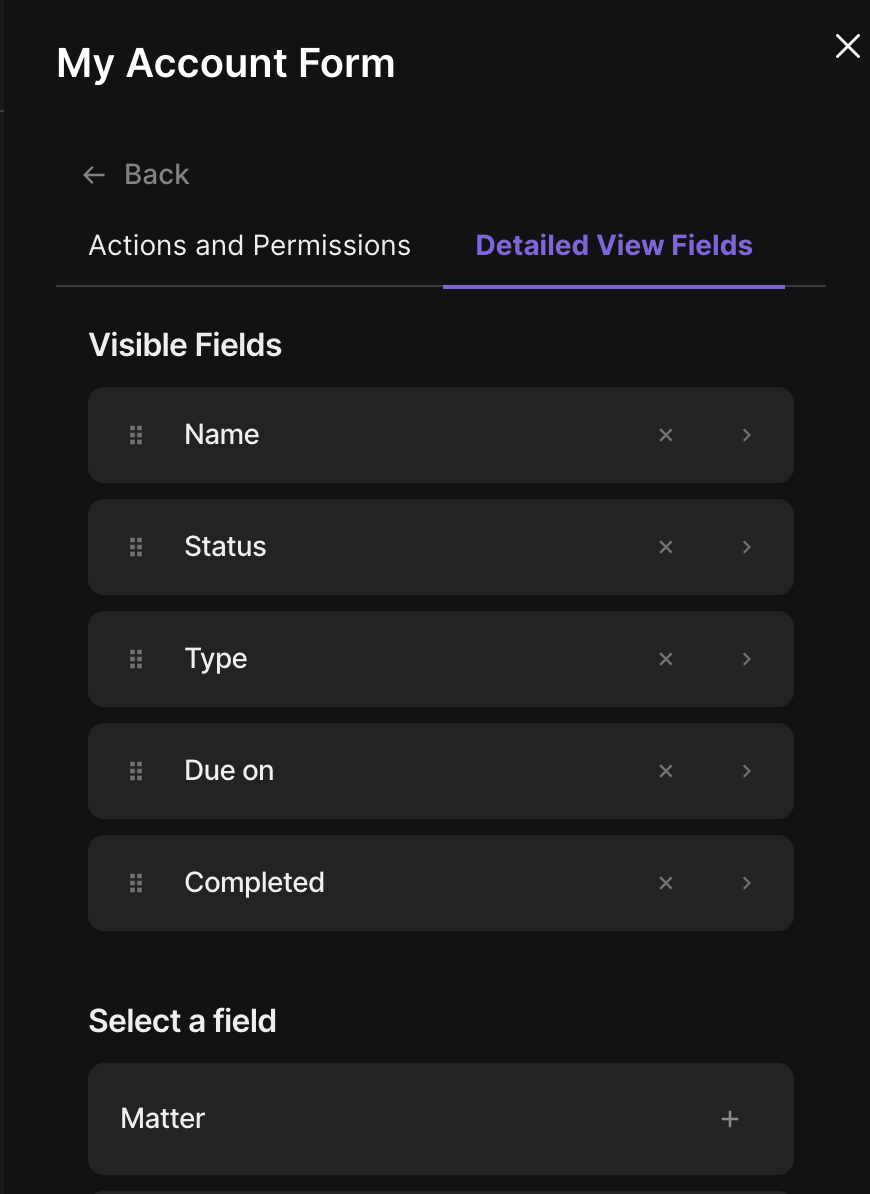
- Edit: edit the values of a selected record (you can select the values in the Detailed View tab)
- Create: save a new record and link it to the user
- Remove: unlink the selected linked record
Or you can select View Only if you only want them to see the information but not modify it.
- Select the fields to include from the linked record and the group it belongs to.
- Click Publish Changes to save your changes.
Previewing the Profile Page
Please make sure you publish changes before viewing as a user
- Select a user and the group to preview as.

You are now viewing the profile page as the selected user.
You can also select a record for previewing.