In this article, we will learn how to create and publish a portal on Pory,
What is a portal?
A "Portal" enables the sharing of data with external parties without giving them full access to your Airtable. Benefits include:
-
Centralized Access: A portal consolidates various community tools and information, allowing members to quickly access key resources and stay connected without navigating through multiple platforms.
-
Personalized Content: Recognizing that not all members have the same needs or interests, portals can deliver content tailored to individual profiles. This ensures that members receive relevant information and updates aligned with their preferences.
-
One Source of Truth: The portal seamlessly syncs with Airtable, ensuring all data and information remains consistent and up-to-date. Members can trust the portal to reflect the most current and accurate data from the primary source of truth.
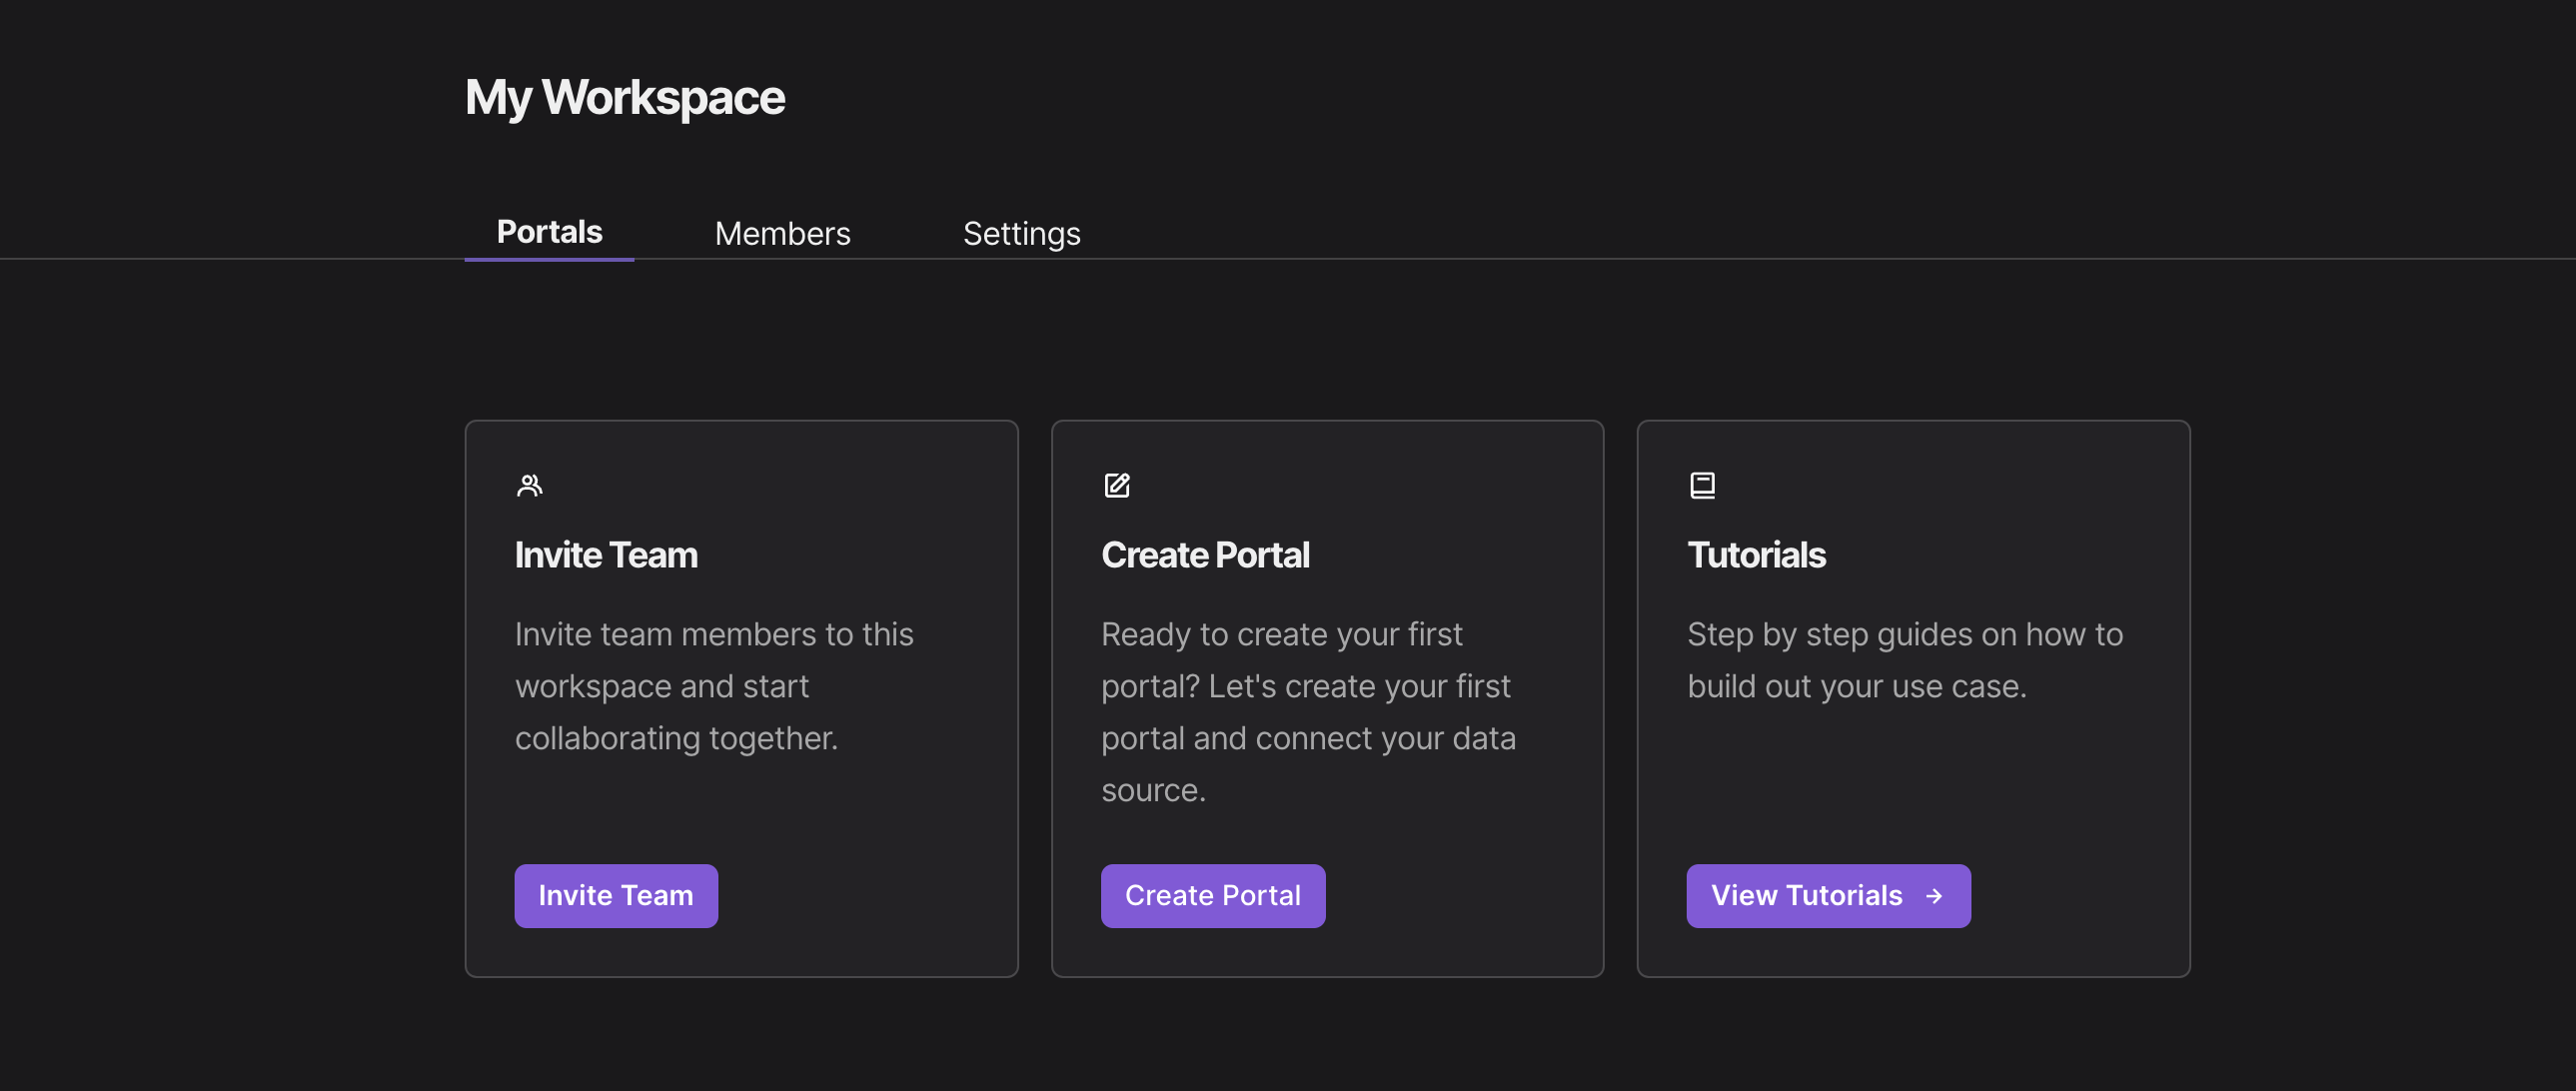
Creating a Portal
To create a portal, go to your workspace and click on the Create Portal button.
Here are the fields in the portal creation modal:
- Portal name: This is the name of your portal.
- Portal domain: This is your portal's domain.
- Color: We'll generate a nice color scheme for your portal.
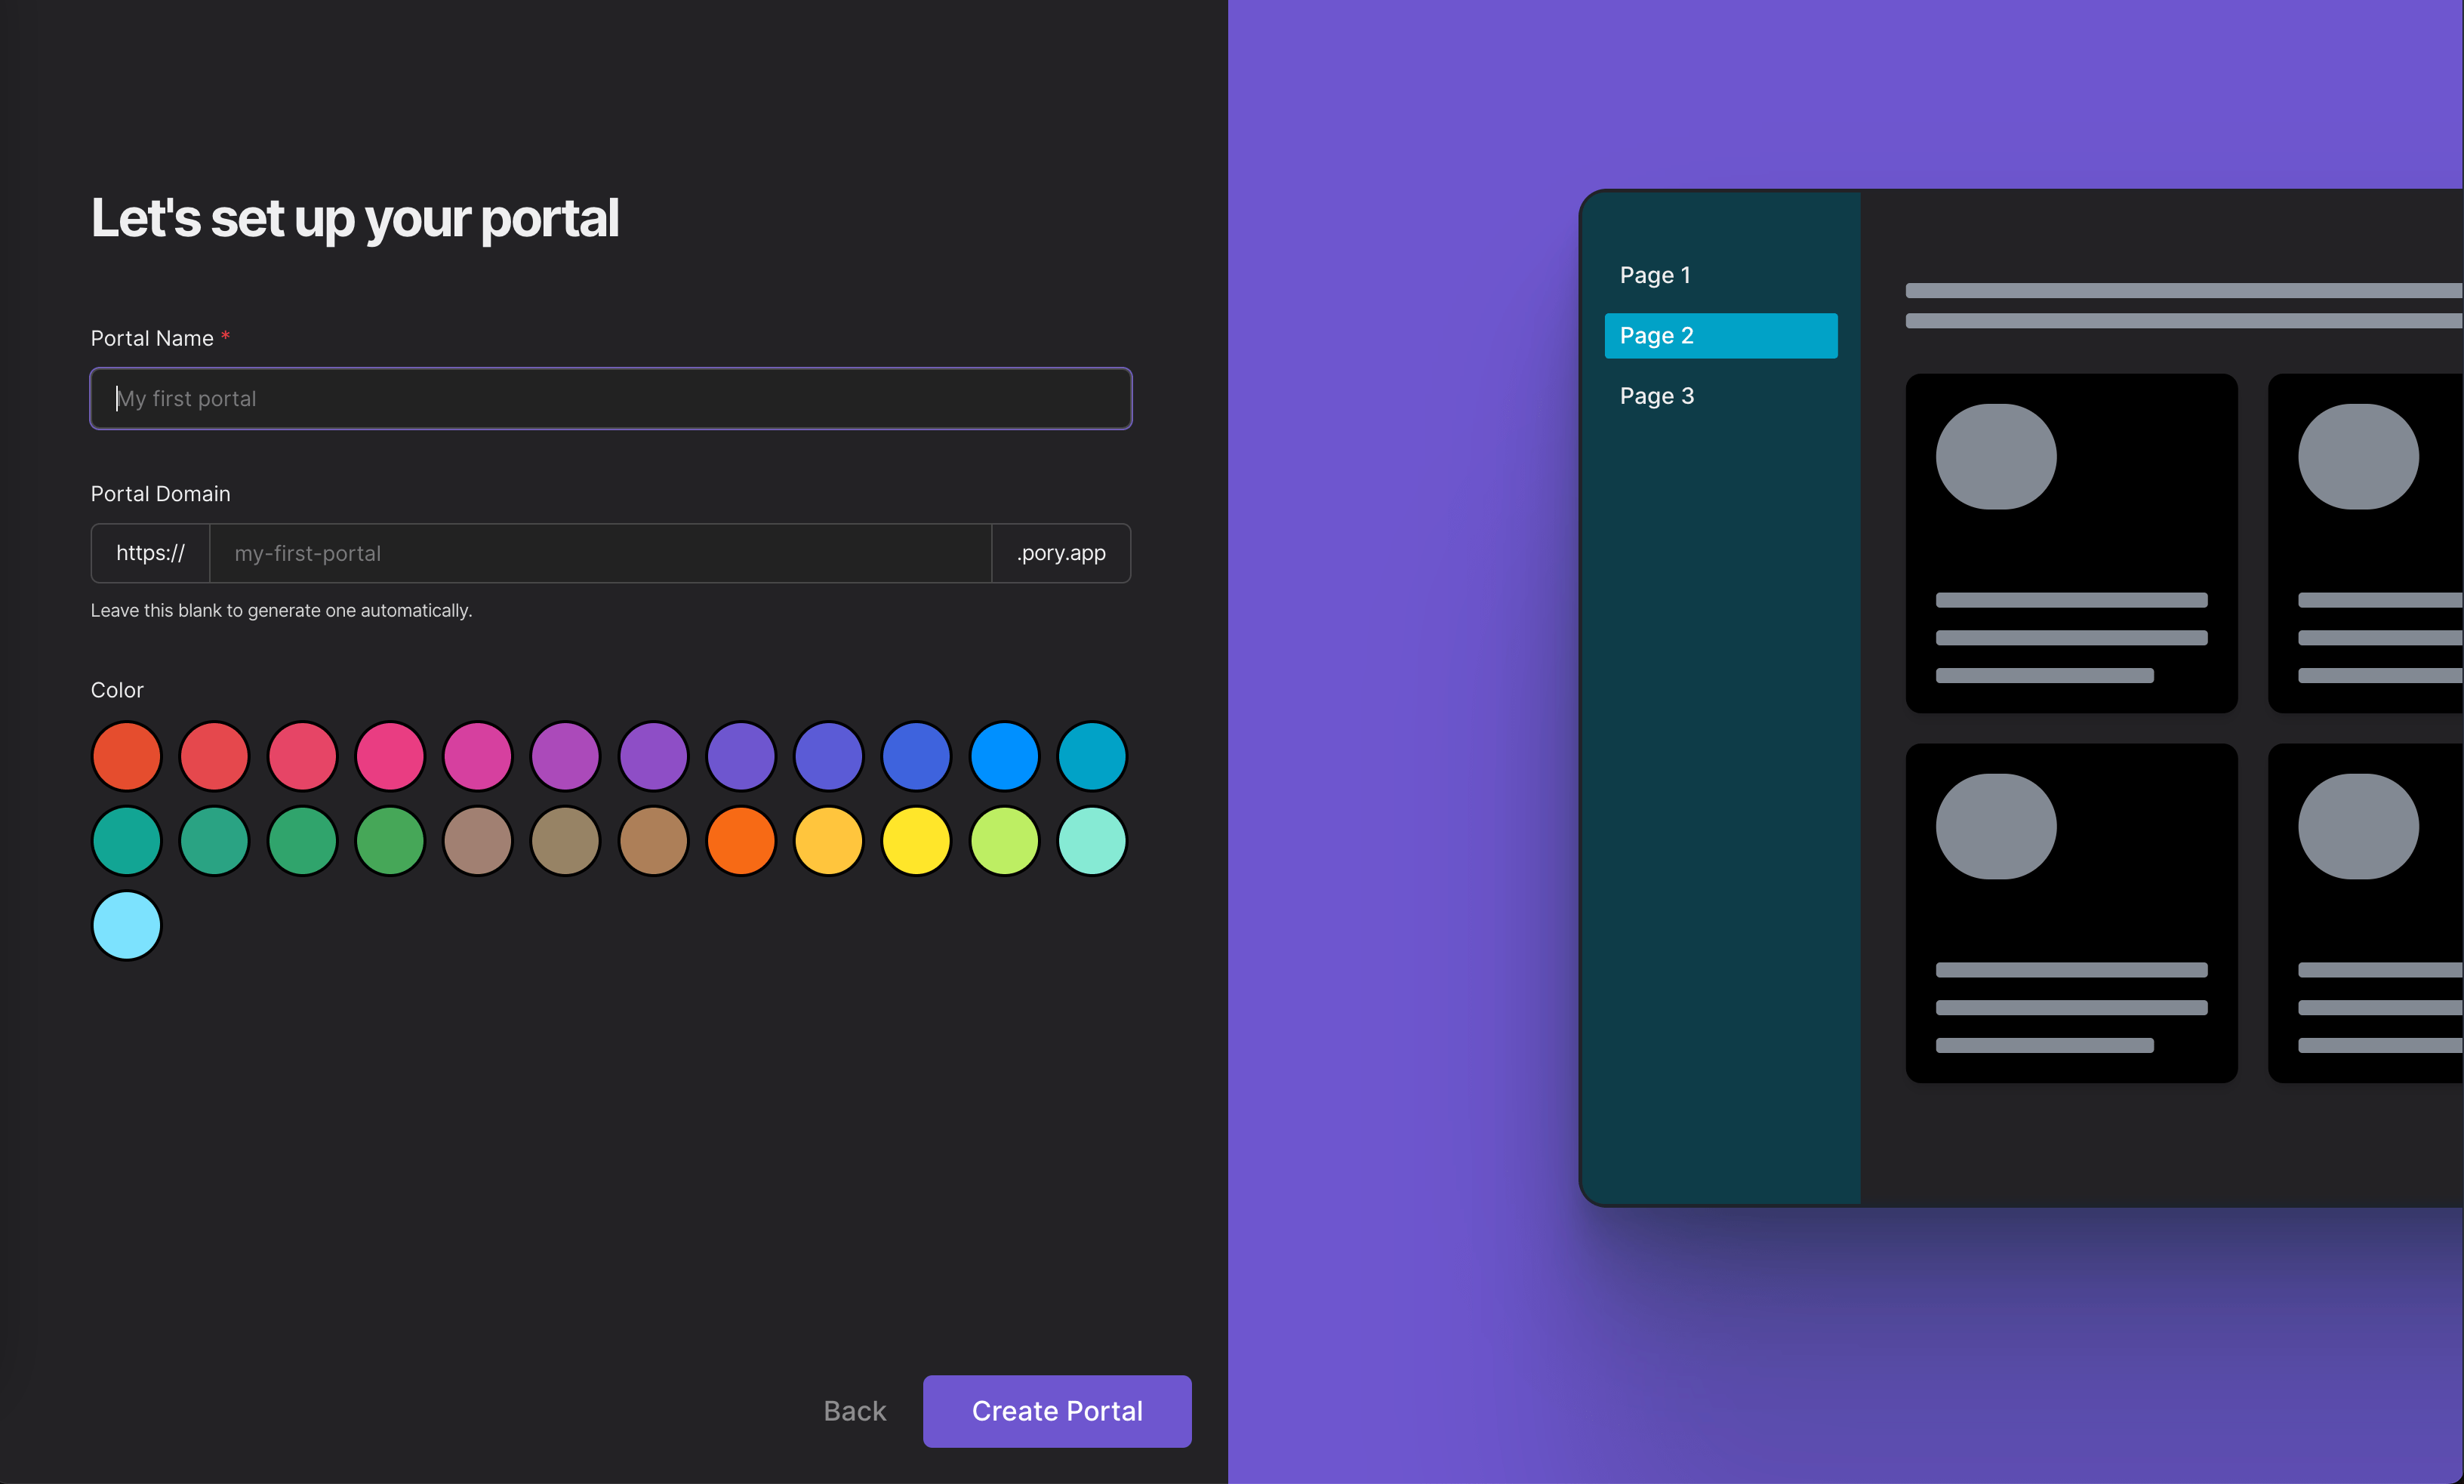
Once you have filled in the fields, click on the Create Portal button to create your portal.
Portal Settings
Once you have created a portal, you can always update its details from the Portal Settings page. To go to settings:
- Click on Edit
- Select Settings from the sidebar
Here you can update general information, logo, favicon, domain, integrations and subscriptions.
Adding Content
From the editor, you can now add different content and listing blocks to build out your portal.
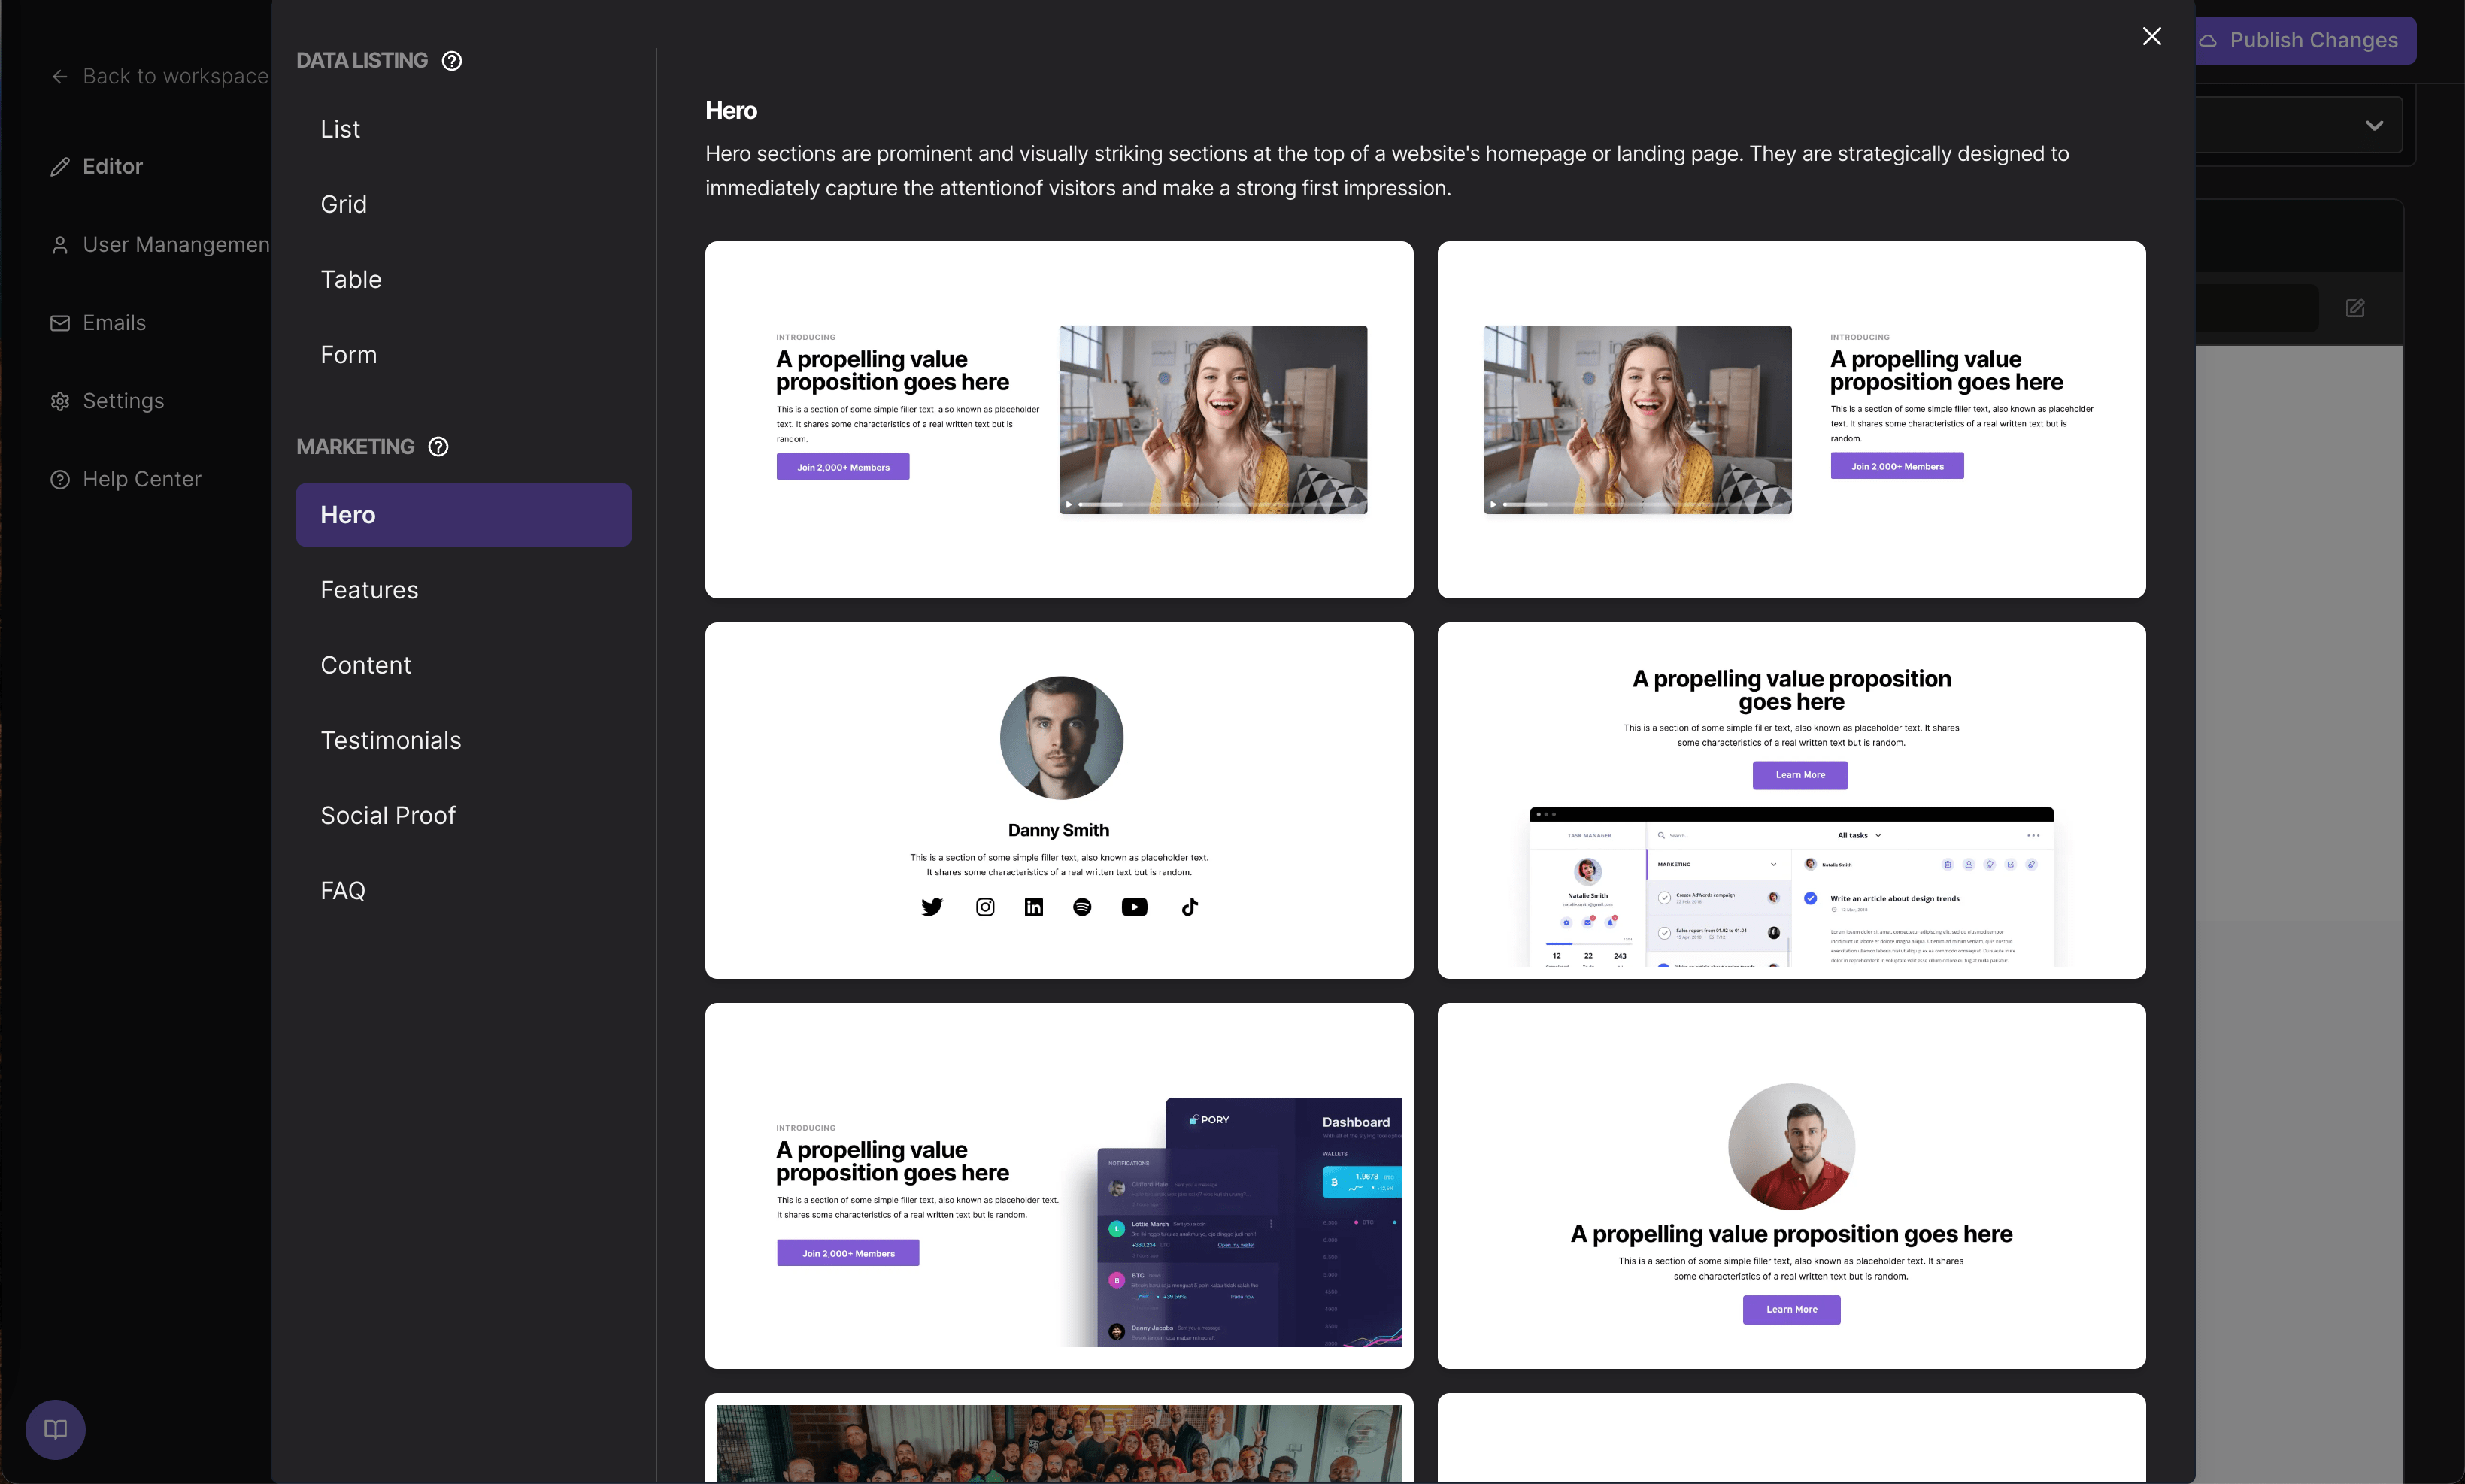
Example of blocks you can create include, but not limited to:
-
Text Blocks: Fundamental to any portal, these allow for the addition of written content, whether it's introductory text, detailed explanations, or any other written information.
-
Image & Video Blocks: These blocks allow for the integration of visual content, be it static images, photo galleries, or embedded videos. They can greatly enhance the visual appeal and engagement of a portal.
-
Forms & Surveys: Interactive blocks where users can submit information, provide feedback, or even make inquiries. They are essential for any portal that requires data collection or user input.
-
Member Directories: A block that lists members or specific groups within the community, often with search and filter capabilities.
-
Resource Libraries: For storing and organizing downloadable resources like PDFs, eBooks, guides, or any other documents.
-
Testimonials & Reviews: Showcasing feedback, stories, or endorsements from members or users.
-
FAQ Sections: A block dedicated to addressing frequently asked questions, offering quick answers and guidance to users.